Faded keyboard keys is a problem faced by almost all laptop and computer users. Prolonged use of a keyboard for typing rubs off the visibility of alphabets, numbers and other characters.
Most people will automatically learn the placement of keyboard keys. However, faded keys still cause confusion, especially when using special characters or multiple keys simultaneously. Therefore, it is important to fix faded keyboard keys to maintain great typing efficiency and to avoid time waste.
In a hurry? The easiest way to fix faded keyboard keys is to simply replace them! So many great and affordable choices on Amazon. (Affiliate link)
Table of Contents
Keyboard keys in a Nutshell
The keyboard keys of a laptop or computer are made from plastic material mostly. The marking of the keys includes alphabets, numbers and some other characters. The background of the keys is usually dark-colored and the letters are in the contrasting color. For example, some keyboards have a black background and white-colored letters whereas others have a white background with black letters. Also, their pattern varies from engraved to printed and painted keys.
Therefore there are multiple ways to fix faded keys ranging from simple to complex tricks. In this article, we’ll discuss all the possible ways to fix a faded keyboard and the method to prevent those keys from fading in the future.
Faded Fix Table: Pros and Cons
| Method: | Pros: | Cons: |
|---|---|---|
| The Print and Stick Method | Easy to do at a low cost. Choose any format. Choose your favorite color combo. | Low-quality. Needs replacing soon. |
| Scratch/engrave | Cheap. easy. long-lasting. | Time-consuming. permanent and could look bad if not careful. Lowers value of keyboard. |
| Replace Caps | Good as new. Best quality. | Expensive. Most can do this, not all. |
| Paint | Looks “ok”. Cheap. Lasts a while. | Needs engraving to work well. Time-consuming. |
| Touchable Fix | Good for low light. DIY craft. It could look nice if done well. | Could turn out bad. Time-consuming. May need to purchase a hot-glue gun. |
The Print and Stick Methods
The first and the most basic trick to fix a faded keyboard is to print the letters and paste them on the keyboard caps.
Pros:
- This trick is easy to do at a low cost.
- It allows you to choose the format of your liking.
- You can have your favorite colored letters with any colored background.
Cons:
- It’s not the best quality
- May need to be replaced sooner
Follow these steps to apply this technique:
- The first step is to print the letters that are faded. It may be better to print all the letters so it matches. This printing can be done at home or at printing shops.
To print the letters yourself:
- Connect a printer to your PC or laptop.
- Now open word processor on your device and type the required letters. An Arial font with a size of 22 points is appropriate for this printing.
- Then select the font and the background color. Make sure both these colors are contrasting to allow better visibility of letters.
- Once all this is done, take out the print.
- Now cut the printed letters separately with scissors in accordance with the size of the keys. The size of the individual letter should be such that it fits the upper part of the keys.
Note: The size of the keys is different for different letters. For example, alphabets are medium-sized whereas numbers are smaller. Moreover, Enter, shift, and space bar keys are large. Therefore the printing and cutting should fit the size of keys.
- The next step is to apply a dual-sided piece of tape to the printed letters. This tape should be equal to the size of the paper. Apply this tape to the backside of the letter.
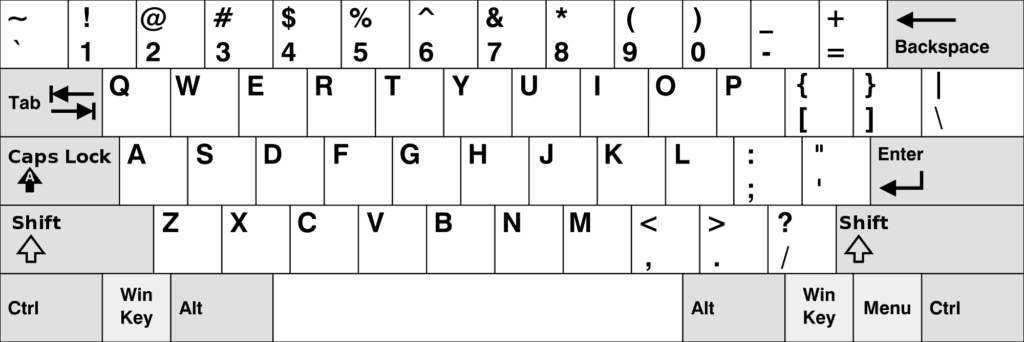
- Finally, apply the keys onto the keyboard. Use the following image for reference if you don’t remember:
This method of fixing keys is complete. It only takes 5-10 minutes to fix the keyboard with this trick. The only precaution is to apply the prints in the correct sequence and order. The drawback of using printed keys is that these prints are easily displaced once the tape loses its attachment.
A simpler version of this fix includes handwritten markings:

- Cut a piece of paper into different parts according to the size of the keyboard keys.
- Write the letters with a dark marker on the paper.
A black marker with a white background or black background with white marking is the most used patterns.
- Apply these cut pieces in their respective place with sticky gum or transparent tape.
Tape Method of Printing Keys
Similar to the previous tip. Print the required letters on a paper and apply a band of tape over it. Now engrave the tape using a cutter so that the tape serves as the background and printed paper is visible as the letter. Now cut the tape and apply to the faded key. This method can be long-lasting as compared to the double tape method.
Sticky Letters
Another easy and cheap trick is to apply sticky letters on the key bars. These sticky letters are available in the market. These letters can be ordered online as well from Amazon. They cost less than 5$ so this trick is also cheap of cost and easy to follow. Buy the sticky letters in your favorite font and colors. To apply these letters, take off the cover from the sticky part of these letters and apply them to your keyboard.
Scratching and Engraving the Keycaps

Pros:
- Cheap
- Easy
- Long-lasting
Cons:
- Takes time
- May look bad if you’re not careful
- Lowers value of the keyboard
This trick is applicable for low-cost keyboards because scratching a keycap affects its appearance. If someone is interested in selling a laptop or PC this method must not be applied because it can lower the resale of your device. However, it’s a long-lasting trick if the device is meant for personal use only.
To apply this trick follow these steps:
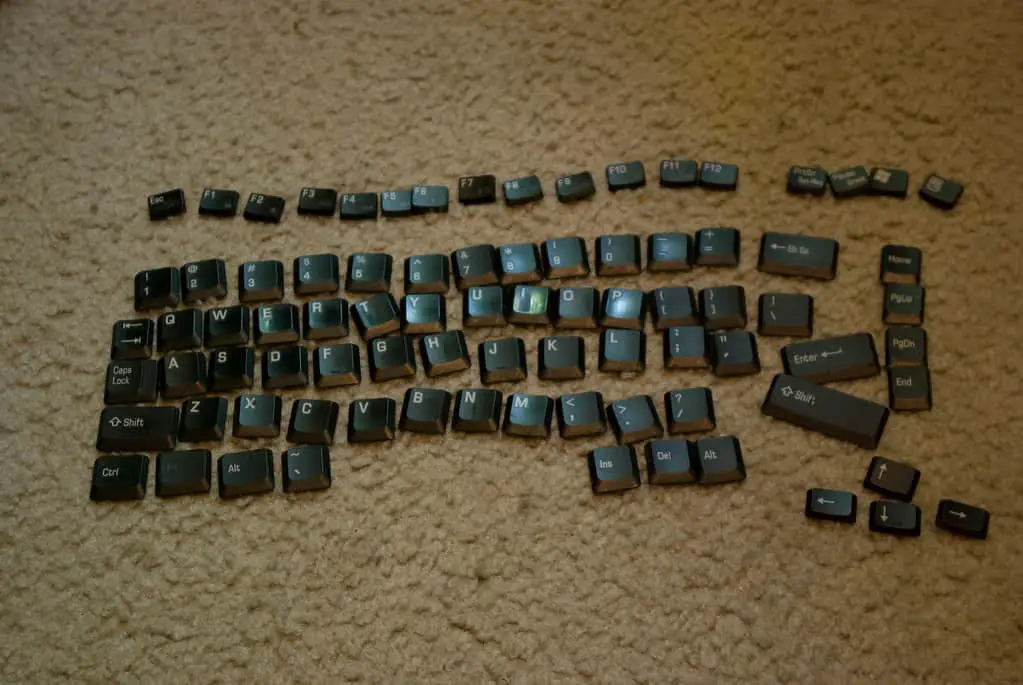
- Gently take out the faded keycaps from your device. You can also apply this to all the keys so in that case take out all the keycaps cautiously.
- Place them separately and mark their identity to avoid any confusion.
- Now take a blade, knife, or a cutter and scratch the respective letter on the key bar. The engraving should be medium so that only the upper surface of the key bar is scratched.
- Blow out the scratched material of the bars.
- Apply any available paint to the scratched part of the bar. Some people apply pastes, nail polish, and melted crayons as paints. However, the color choice must be good to enable better visibility.
- Let the paint dry.
Apply the keycap back in its place in the keyboard and repeat the same process for all the keycaps. Make sure you scratch the appropriate letters. The repair trick is complete and available for long term applications.
Replace the Keycaps
Pros:
- Good as new
- Best quality
Cons:
- Can be expensive
- Some keyboards may not be able to do this
The hardware of almost all keyboards is designed in such a way that the keys can be taken off easily. A little outward force is required to takeout the key bar without any damage to the function. Moreover, keycaps can be purchased separately from any tech shop at a low cost.
Another advantage of this trick is that you can buy the required keycaps individually so this helps in saving some cash. Gently take out the faded caps and then apply the new ones in its place. This trick is useful for those people who possess a high-cost keyboard and they want a standard keycap rather than using printed paper.
Keyboards with different patterns and styles are present. The only precaution is to match the type of old and new keycaps to avoid any inconvenience.
Painting the Keys
Pros:
- Looks okay
- Cheap method
- Last a decent amount of time
Cons:
- If the keyboard doesn’t have engravings then it won’t work as well
- Time-consuming
One simple way to restore the faded keys is to paint them. Most keyboard bars have inbuilt engravings that sometimes lose their color. Applying paint can restore them to their original forms.
Which type of paint to be used depends upon availability. For example, some people use whiteners, inks, and nail polish to fill these engravings. However, some people apply non-removable paints to their keyboards. Thus any worthy coloring object can be applied but it’s better to use permanent and contrasting paint for long-term use. There is no need to color the whole bar and it’s better to write the letter only.
Here’s a quick tutorial for how to paint keyboard keys:
- For practice, test this on, a hard plastic (one you don’t care about.) similar to the keys.
- Pop off the key.
- (Optional — Spray the key with a different colour of plastic paint than the step below and let dry for at least a day.)
- With small stick-on letters from the stationary store (like Staples) put on the letter you wish and press down very well.
- With plastic spray paint colour of choice, spray the key and let dry for at least a day.
- Note: when spraying from the can — not very thick and from at least 7-10 inches away with back and forth swipes.. only a few times. Spray from directly above , not at an angle as this will hit the inner edges of the letter .. etc.
- Peel off the letter.
- Clean the glue up with a little paint thinner.
- You are done.
- With the plastic paint, I expect this to last.
Touchable Fixation of Keys
Pros:
- Good for low light or bad eyesight
- Easy DIY craft
- If you are artistic it may look nice
Cons:
- If you aren’t crafty it may look horrible
- Time-consuming
- Need to buy a hot-glue gun
This method of fixing a faded keyboard is dedicated to old people and those with weak eyesight. Moreover, some keyboards don’t have the backlight option so this will also help in the absence of light. This trick will allow the users to see and feel the letters. The steps to apply this simple and useful technique include the following.
- The first step is to make solid keyboard type letters. You can also purchase these small letters. At home, these letters can be made from small sticks. Shape the sticks in the form of letters and use glue to hold. Make sure that the letters are in accordance with the keycaps. Apart from sticks they can also be made from a glue gun. The use of contrasting colored glue to make the letters is the best way to make such letters.
- Now apply some glue to the external part of these letters and add a glitter substance to it. This glitter will make them shine and more visible with a small light.
- Glue the lower surface of these letters and apply them gently to the keycaps.
- Let the glue dry before using the keyboard. Now keyboard with brand new features is ready for more efficient use.
This fix is more effective with colored glue guns as compared to the sticks or other material. Glue guns allow better markings of the letters within the range of the caps. These hard letters are easily recognized by touching and therefore provide a good aid to people with weak eyesight.
Emergency Fix
Sometimes emergency use of typing is required but the faded keys pose a difficulty. This situation can be solved by the use of other modes of typing. These modes include:
- An on-screen keyboard
- USB connected mouse
- Laser mouse and others.
Low-cost keyboards can also be purchased in case of an emergency if your budget favors.
How to Prevent Keys from Fading
The health rule ” prevention is better than a cure” is also applicable for non-living objects. Therefore to prevent the key bars from fading is better than looking for ways to fix. Thus this part of the article is concerned with different ways to prevent erosion and fading of keyboard keys.
Keyboard Covers
A great number of custom keyboard covers are available in the market and online stores. These covers are present in different styles. Some covers are made of transparent plastic which allows the visibility of letters. Other pattern includes colored plastic that has a lower sticky end and letters are present on the upper end.
These covers provide good protection to the keyboard from dust and spills. It also prevents the fading of letters. They serve as a protective sheath for the keyboard.
Paint
The already present letters can be painted over to prevent fading from frequent use. Any coloring material can be used for this purpose. Some commonly used materials include Krylon fusion paint, nail polish, inks, whiteners, and other coloring paints. Although the painted colors don’t last for long intervals they can be painted over and over again with ease.
Packing tape
This is the easiest and simplest method to save the prints of keyboard letters. The only requirement includes a packing tape and a blade. Apply the transparent tape softly to the upper part of the keys and cut the extra tape with a blade. Make sure no extra tape is present. This transparent tape will avoid the direct application of fingers on the bars and thus fading can be prevented. It also prevents the effects of spills on the keyboard.
Stickers
Stickers can also be used to prevent fading. A great amount of keyboard stickers is available online with a small, medium and large-sized font. Their style and colors are also variable. These stickers easily stick to the caps of the keyboard and hide the original markings.
Light Touch
The last tip for the prevention of keyboard keys from fading is to avoid rough use. Keyboard keys are mostly durable for a long time except when used roughly. This rough use involves many things. Striking key bars with some object, excess dust, cleaning with deterging liquids and frequent spilling of materials leads to quick fading. Therefore these things must be avoided.
Use a dry cloth for cleaning. Cover the keypad with some cloth or plastic sheet when not in use. Avoid spilling water and other materials on the keycaps.
Conclusion
I know that was a lot to read! if you just scrolled to the end then I know what you want. The following will be a quick overview of everything I went over in this article.
How to Fix Faded Keyboard Keys
- Print new keys and paste them on
- Buy a pack of keyboard letter stickers
- Engrave the keycaps
- Replace the keycaps
- Paint over the key
- The touchable method
How to Prevent Faded Keyboard Keys
- Keyboard covers
- Paint
- Packing tape
- Stickers
- Don’t be rough
Follow these simple steps to fix any faded keys, and prevent it from happening in the future. This can considerably increase the life span of your keyboard.