
If you’re big on mechanical keyboards, you probably already know what lubing is. However, if you’re new to mechanical keyboards and you’re thinking of getting one, the process of lubing is going to revolutionize your keyboarding experience.
Some high-end keyboards come with pre-lubing, which at times might not be what you’re looking for. That’s why you need to learn about cleaning pre-lubed switches so you can re-lube them with your preferred materials,
You might be wondering, how exactly can I clean pre-lubed key switches? Well, that’s what I’m here to tell you.
In this article, I will talk about key switch lube and explain why lubing is great for your switches. And mainly, I’ll be explaining how you can deal with pre-lubed switches and clean them for your own good. So, before you start using your new mechanical keyboard, let’s learn everything we need to.
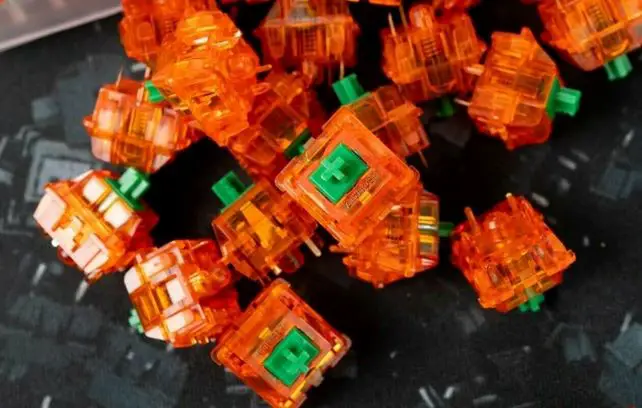
Table of Contents
What is Key switch Lube?
Key switch lubes lubing liquid materials that can help make your switch smooth and glide easier. These lubes are meant specifically for lubing the mechanical key switches in a keyboard and work on the same principle as any other lube.
The main thing about mechanical keyboards is that the key switches can sometimes get stiff and become janky. This might change their performance or mess up their sound. Well, by applying lube, you can take away these flaws and bring those switches a new life.
Think of your keyboard switches as a rusty door lock. One that makes a lot of sounds and is difficult to operate due to the rust. A little oiling can go a long way and make the functioning of the lock much better. The key switch lube will be doing that essentially. That’s why you need to lube your mechanical switches and repeat the process after a specific period of time.
Benefits of Lubing Mechanical Key Switches
At times people ask me, what is the purpose of lubing mechanical key switches? What kind of benefits do they offer? Well, to address their question and to make things easier for you to understand, I’ve made a list of all the benefits that come with lubing mechanical key switches. So, let’s take a look.
- Better Sound – When you apply lube on your keyboard’s mechanical key switches, the overall clickity-clack and bad sounds due to increased friction will reduce, and the sound of the keypress will become much better.
- Understanding the Key switch mechanics – According to my experience about lubing your keyboard switches, the best thing is that you get up close and personal with the key switches. As a keyboard enthusiast, you need to know how the switches work, what components they have, and how to DIY lube them. It will surely help you a lot in becoming a better keyboard enthusiast.
- Smoother Keypress – When a keyboard is used too much, at times dust can get accumulated in the key switches, which can increase the friction, hindering the performance of the key switches. By lubing them, you can reduce that friction and get a smoother, more original keypress feel.
- Enhanced Performance – A lubed key switch performs overall better than a non-lubed switch. The smooth experience, along with the sound and the feel of the switch, is much enhanced.
- Note: However, it is wise to note that clicky switches shouldn’t be lubed. They’re meant to have a clickier feel and heavy sound, and by lubing them too much, you might take away their clicky sensation, which is not ideal.
What are Pre-Lubed Key Switches?
Pre-lubed switches are a thing, trust me. Higher-end keyboards and sometimes common mechanical keyboards as well tend to be factory lubed. This means that the key switches inside them are lubed before they are sent to retail.
If you buy a keyboard with pre-lubed switches, it means that the keyboard would have switches that are already lubed when they were being assembled. Sometimes, pre-lubed switches can be a blessing.
But it’s not always great to have pre-lubed switches on your keyboard. It might actually indicate that the switches aren’t great in their original form, and to make their performance better, they were factory lubed.
We don’t need to judge before trying, though. Keyboard manufacturers mostly think well of the buyers when they’re pre-lubing the switches so that the users don’t have to spend additional time enhancing the performance of a key switch themselves.
Why you Would Clean Pre-lubed switches
As we’re on the topic of how pre-lubed switches can be problematic for you, I believe it is the right time to talk about cleaning your pre-lubed keyboard switches.
Yes, it is a practice that often comes with a lot of benefits. But exactly why should pre-lubed switches be cleaned; Here are some of the reasons cleaning pre-lubed switches is important:
- Applying New Lube – If you’re thinking of replacing the old lube on your keyboard’s switches that have worn out with new lube to improve the performance and clicks of the switches, then you’ll need to clean the switches yourself.
- Bad quality lube – At times, manufacturers use low-quality lubing to cut production costs and keep their heads high. To make sure that the bad quality lube is taken off immediately from the key switches, you’re going to need to clean the lube off of them.
- Not a fan of pre-lubing – If you’re not a fan of pre-lubed key switches and you prefer to use mechanical switches in their original form, then you’re going to need to clean those switches so any pre-lube can be removed off their surfaces.
- DIY Lubing – DIY key switch lubing is an enjoyable and exciting activity. If you want to experience it for yourself and learn more about key switches, you should take the pre-lube off by cleaning the key switches. This cleaning will help you get ready for lubing the switches on your own with a key switch lube of your liking.
How to Clean Pre-Lubed Keyboard Switches
So, you’re thinking of cleaning your pre-lubed keyboard switches; Well, lucky for you, I’ve made a proper step-by-step guide that you can follow to clean them. Let’s take a look at it so that you can follow.
Step 1: Gather Tools
Whenever you’re dealing with a DIY project, the first order of business is always to gather the materials and tools you’re going to use to perform your work. In this case, here’s what we’re going to need:
- A plastic container
- Isopropyl Alcohol to clean the key switches
- Gloves
- A microfiber cloth
- Soap
- Water
- Key switches
That’s about everything you’re going to need to clean your pre-lubed switches on a budget. There are other cleaning methods available, but they’re way too expensive.
Step 2: Pull the Keycaps off
Now you’re going to pull the keycaps off of your key switches, basically. This can be difficult on some keyboards. However, in most keyboards, you can pluck the keycaps off of your keyboard using your fingers.
If you can’t, what you’re going to do is take a keycap puller or a fork and jack the keycaps off but make sure you don’t put a lot of effort in, or you might end up damaging the keycaps. This is a crucial detail to remember.
Step 3: Open the Switch
After you’ve taken off all the keycaps from the keyboard, you’re going to have exposed pre-lubed switches in front of you. But they’re still inside the keyboard. So you can use key switch pullers or your hands to take out the switches from the keyboard carefully.
After that, you’re going to gently open the switch so that the housing and the base are separate because you want to clean the switches completely. Take the key switches apart and then move onto the next step.
Step 4: Add Isopropyl Alcohol in Container
Isopropyl Alcohol is a type of alcohol that is widely used for cleaning purposes. You can find around 70% concentration of IPA with water which is optimal for cleaning key switches and taking off lube from them.
The best thing about Isopropyl Alcohol is that it can be bought cheaply and is an easier cleaning solution for pre-lubed mechanical key switches. You can even save it for future use.
What you’re going to do in this case is that you’re going to pour a large amount of IPA into a plastic container of appropriate size. This is going to be the ground for cleaning your key switches.
Step 5: Dip the Switches in the Container
As you’ve opened the switches, you’ll have a lot of pieces that you’re going to have to keep an eye on. Please take all the pieces of switches and make sure you gently dip them into the container.
The container mixture of Alcohol will take the pre-lubed switches and strip them off the lubing attached to the switches. It will take a few hours for the switches to get the lubing removed from them.
Step 6: Take the Switches out and dry
After several hours of dipping the mechanical switches in the container filled with IPA, you’re going to make sure you wear your gloves before you take any further steps.
You can use a strainer to take the switches out or if you have gloves on, make sure you’re safely operating and taking every piece out of the solution. These key switches will now be lubeless, which is exactly what we want to see.
Step 7: Use Soap and Water
Although there won’t be lube left on the surface of the key switches, they’re still not completely clean as we’d want them. So for that purpose, we’re going to use the good old mixture of soap and water.
You can put soap and water in a container and then put the keys in there. This will ensure that the keys have a clean surface and any leftover lube is removed without a trace.
Step 8: Let the switches dry again
It is time for you to dry the key switches. For this, you’re going to use the microfiber cloth. Take the microfiber cloth and clean the mechanical switches thoroughly. Then, rub the housing and the base with the microfiber cloth.
After that, you can place the switches on a surface. It will be wise if you keep the switches dry in a moisture-free environment overnight so that there’s no trace of any wetness. That’s it with the cleaning process.
Step 9: Enjoy your clean key switches
After the cleaning process is over, you’re going to take switches and join them, and place them back into their socket. You’re also going to place the keycaps back into place.
If you’re a fan of lube-free switches, you’re going to love using these now. However, if you want to apply new lube on the switches, then add that process to this list because the feeling of newly lubed switches is simply amazing, and you’re going to love it definitely.
Bonus Cleaning Method: Using Ultrasonic Cleaner
An ultrasonic cleaner is capable of cleaning liquids and tightly adhered materials like lube off of key switches. All you need to do is place the key switches into the container of the cleaner after opening it and let it do its work. But, unfortunately, this method of cleaning is expensive, which is why only use it if you have it available. Otherwise, the cleaning cost would be more than what the keyboard you bought was worth.
Conclusion
Cleaning pre-lubed switches can be pretty great for your keyboard and the overall user experience. With the help of the above-mentioned methods, you can easily clean your pre-lubed mechanical switches and then choose to apply new lubing or simply not to, depending upon your choice.
I hope you learned a lot from this guide and that you’re going to have a great time cleaning your keyboard switches while you have a snack nearby and some sweet tunes in the background. Have an amazing keyboarding experience!