If your gaming keyboard is not performing the way that it used to when you first got it, it may be an indication that it’s time to clean it.
There are definitely many benefits to cleaning your gaming keyboard.
- If your keyboard doesn’t register every time you press the key, cleaning it may resolve this.
- If your keyboard is less clicky than it once was, scrubbing it down will likely fix this issue as well.
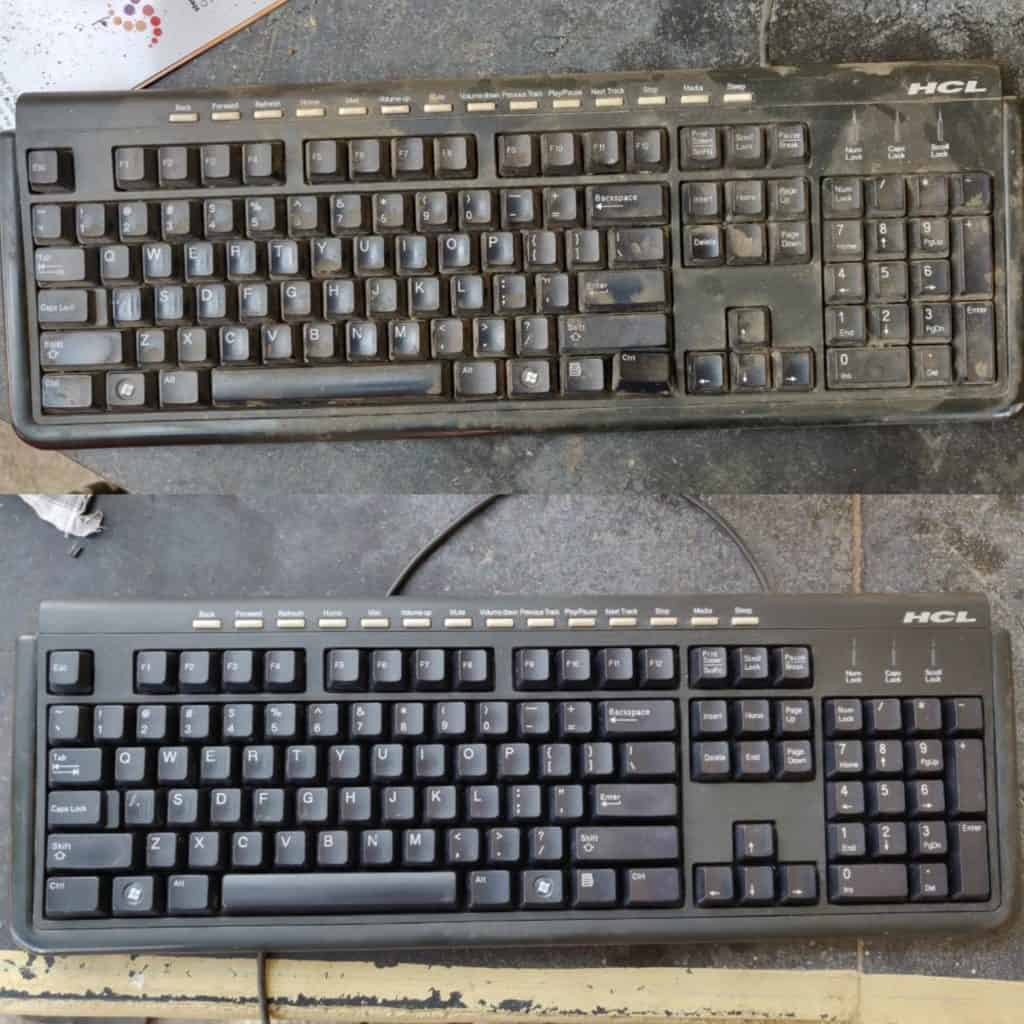
- If your keyboard is just gross looking, obviously giving it a bath is the solution.
These are just a few examples of the possible upsides to maintaining your equipment. In this article, I will go over all of that and more. Continue reading for an in-depth explanation of how to clean a gaming keyboard.
Table of Contents
Overview of Keyboards and Maintenance
Gaming keyboards take a lot of abuse. They are exposed to things like oils from your fingertips, food and drink spillage, dust from the air, possibly bits of dirt, and perhaps even some hair may lodge itself between the keycaps.
Because of this, it’s important to have a regular cleaning schedule for your gaming keyboard. It will be different for each individual depending on the amount of use.
Aside from a regular cleaning, gaming keyboards will also need a deep cleaning from time to time. This will be very time-consuming and tedious. However, it is important to do it at least once or twice per year depending on your usage.
Some keys are a bit harder to get to such as the spacebar and enter key as they are attached to stabilizers. You may want to wait on cleaning these during a deep cleaning.
The good news about maintaining your keyboard is that you can get away with using common household products. This includes things like cotton swabs, a vacuum cleaner, brush, microfiber cloth, etc.
How to Clean a Gaming Keyboard: Light and Deep Cleaning Methods
In the following sections I will go over both deep cleaning as well as light cleaning methods for your keyboard.
You will typically do light cleanings in-between the deep cleanings to keep the keyboard in top shape.
Keeping a consistent light cleaning schedule will also reduce the need for a deep cleaning which means you won’t have to take your keyboard apart which can be a pain!
Let’s get started.
Light cleaning for regular maintenance
It is a good idea to keep a regular cleaning schedule for your keyboard. The intervals will vary from person to person depending on how much it is used.
Things like oils from the skin, dust from the air, food crumbs, and drinks spilled can slowly accumulate on, around, and inside the keyboard.
It is important to keep your space clean and your keyboard wiped down to avoid these things from “getting comfy and creating a home inside your keyboard.”
As it accumulates, your keyboard will start to perform badly. In general, not cleaning your gaming keyboard will create all sorts of problems.
With that being said, let’s go over some quick and easy cleaning steps for cleaning your keyboard!
Materials
So, what materials do you need for this? Not much, I will try to keep it very simple!
- You will need a couple of microfiber towels, one for cleaning and one for drying.
- Some cotton swabs for the hard to reach areas.
- Some sort of cleaner. You could use an all-purpose cleaner, isopropyl alcohol that has been diluted, or just simple warm water if it’s not too dirty.
- You may also want to use a vacuum cleaner with an attachment allowing it to get more of the keyboard.
Step-by-step guide
Now you have everything you need to get started, let’s go over the step-by-step guide to lightly cleaning your gaming keyboard.
Step 1) Disconnect your device
This may be obvious, when cleaning electronics it’s always common practice to remove any power going to it.
Step 2) Vacuum
Use your vacuum with the suction setting. If your vacuum can be switched to blowing mode, I wouldn’t recommend it. This may cause dust particles to lodge themselves deeper.
Step 2-B) Alternative to vacuuming
If you don’t have a vacuum cleaner, or in addition to vacuuming, you can turn the keyboard over and give it a nice shake. This will remove some debris. It isn’t perfect but still better than doing nothing.
Step 3) Wipe down the keyboard
With your choice of cleaner, either isopropyl alcohol that has been diluted, all-purpose cleaner, or lukewarm water, give your keyboard a nice wipe down.
Use a microfiber cloth to get the base of the keyboard, and use a cotton swab to get the cracks and crevices. They work great at getting in between the keys and underneath them.
Some keyboards may be extra filthy. If this is the case, you may use a toothbrush to help remove caked-on material.
Step 4) Dry
Using a separate microfiber cloth, wipe down your keyboard until it’s dry. The reason to use a microfiber cloth rather than a paper towel is that they tend to fall apart causing a mess.
Complete!
That’s it! Pretty straightforward. This simple cleaning practice can make sure your gaming keyboard lasts longer and performs at its best.
Doing this regularly will also keep you’re bored from needing a deep cleaning too soon. Which is a lot more work and not fun.
Deep cleaning twice a year
If your keyboard is a bit more filthy than usual, it means it’s time for a deep cleaning. Also, if it’s been a while since your last deep cleaning it could need one even if it doesn’t appear that way.
Deep cleaning involves removing some parts to get harder to reach areas that you may not be able to see. It’s a good idea to do this type of cleaning at least twice a year depending on your usage.
This cleaning is similar to light cleaning with a couple of changes. As I’ve mentioned you will be removing your keycaps and you will also use a safe solvent to get a thorough cleaning.
Materials
Similar to the light cleaning method, you will need a cleaning product, cotton swabs, and a couple of microfiber towels. In addition to those, we will be adding a couple more things. Here is the complete list:
- You will need a couple of microfiber towels, one for cleaning and one for drying.
- Some cotton swabs for the hard to reach areas.
- Some sort of cleaner. You could use an all-purpose cleaner, isopropyl alcohol that has been diluted, or just simple warm water if it’s not too dirty.
- You may also want to use a vacuum cleaner with an attachment allowing it to get more of the keyboard.
- A bowl of warm water to combine your choice of solvent creating a deep cleaning solution.
- A safe solvent of your choosing. The most recommended solvent for deep cleaning your gaming keyboard is denture tablets. However, if you don’t have these or the money to buy them you can use a drop of laundry detergent or a strong all-purpose cleaner like Simple Green.
Step-by-step guide
Now you have everything you need to get started, let’s go over the step-by-step guide to deep cleaning your gaming keyboard.
Step 1) Unplug the keyboard
For the same reasons as mentioned previously
Step 2) Remove the key caps.
For this you can use your hands or preferably a keycap puller. This will make it easier.
Make sure you only tug on the caps and not the switches as they are soldered on in most cases.
It is important for you to take a picture or have one handy so that you can remember where are your keys go. This is especially important for custom keyboards that may have a non-standard layout.
Step 3) Vacuum
Just like with the light cleaning it’s important to use the suction to get any debris inside the keyboard. With the keycaps off you should be able to get even deeper inside the board.
Step 4) Swab and scrub
You also should use a cotton swab during this deep cleaning process. Again, getting in and around all crevices as best as you can.
Some keyboards may be extra filthy. If this is the case, you may use a toothbrush to help remove caked-on material.
Step 5) Clean the caps
With your solvent of choice, create a deep cleaning solution by mixing it with warm water in a bowl. Put the caps inside and allow them to soak for about 20 to 30 minutes.
If you’re feeling especially lazy you can throw the caps into the dishwasher. However, make absolutely sure that the heat setting is turned off. Otherwise, most keycaps will not survive.
Step 6-optional) Lubing your switches
This step is optional and not necessary for the regular maintenance of your keyboard. Some people like to use lube and others don’t. However, if you like the results of a lubed up keyboard now is the time to do that.
If your keyboard isn’t hot-swappable you may need to desolder your switches for the best lubing job. Or read up on my quick guide on how to lube switches without desoldering. It isn’t perfect, but it’s a lot faster and the result is pretty good.
Step 7) Finishing touches
After allowing the caps to soak you can now strain them and rinse them off with warm water. After this, set them down on a microfiber towel and allow them to dry.
Once you are positive that the keycaps are fully dry you can reassemble the keyboard making sure to use your photo for reference.
Complete!
That’s it. Not a whole lot harder than light cleaning. It’s just a tad bit more involved and tedious. The hardest part is removing all the caps and putting them back on.
So. Very. Time-consuming!
Things to avoid while cleaning
If your vacuum has a blowing mode avoid using it.
Also, Some people use compressed air on their keyboard but that isn’t advised for a couple reasons.
The compressed air comes out cold and creates condensation. This could mold or short out the keyboard if plugged in wet.
Also, forcing air into the keyboard could cause debris to wedge itself inside. This could cause the keys to not press down correctly or cause other issues.
One final thing, when choosing a solvent please make sure you use the recommended products. Do not use things like ethyl alcohol or acetone. They are not usually safe for cleaning electronics, PCBs, or other parts of the keyboard.
These chemicals are pretty strong and could cause damage. To be safe I would just avoid using them.
Conclusion
Well, that’s it! You now have a full understanding of proper maintenance for your keyboard. We went over two methods. One should be done regularly and one about twice per year. Of course, it all depends on how much you use your device.
A light cleaning should be done fairly often especially if you use your keyboard a lot. The good news is this is pretty quick and easy to do. As long as you keep up with your keyboard it won’t need to be deep-cleaned too often.
A deep cleaning should be done about twice per year as long as you are keeping up with the light cleaning. This is a bit more involved and requires taking the keycaps off to really get in there good.
During a deep cleaning, it’s also a good idea to lube your switches if you’re into that. Though, it’s not required.
Now that you know how to clean a gaming keyboard it’s up to you to keep it cleaned. If you do, it should keep performing well and last a long time!
Related article: How long to mechanical keyboards last?
Sources:
https://www.pcgamingrace.com/blogs/guides-resources/cleaning-mechanical-keyboards
https://www.daskeyboard.com/blog/updated-guide-how-to-clean-a-mechanical-keyboard/
https://www.youtube.com/watch?v=EG0JmFS4yNg
https://switchandclick.com/2020/01/08/keyboard-cleaning-guide/
https://www.gamersnexus.net/guides/1569-how-to-clean-mechanical-keyboard-putty