Making some small easy mods to your mechanical keyboard can take it to the next level. Often we immediately look at buying a new keyboard as our best option when we want an upgrade, however, we should probably think about ways to improve the keyboard we are already working with.
It’s cheaper and can be pretty fun to put your own bit of creative flair into the keyboard. Creativity doesn’t just mean painting your keycaps, it can mean making hardware modifications to make your keyboard better.
If that’s something you are interested in or are simply curious about what keyboard mods even are, you have come to the right place. Here you’ll find an explanation of what we mean when we say keyboard mods as well as what those mods might be.
Easy Mechanical Keyboard Mods you Should do Now:
- Keyboard Switches
- Keycaps
- Artisan Keycaps
- Stabilizers
- Switch Films
- O-rings
- Custom USB Cable
- Convert to Bluetooth
Hopefully, you’ll see the benefit of making these mods because not only will it elevate your keyboard to the next level; but it’s fun!
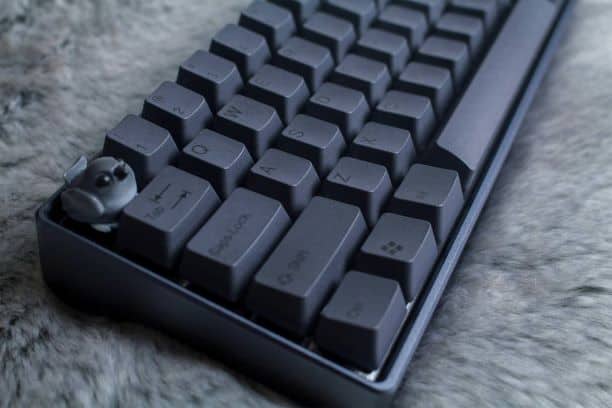
Table of Contents
What are keyboard mods and why do them?
First, we should probably discuss what keyboard mods actually are. When we talk about mods we are of course talking about modifications. Making hardware changes to help improve your keyboard.
Often, people do this when they buy a bare-bones keyboard on a budget and then want to make gradual improvements over time.
That’s one of the best things about mechanical keyboards over the alternatives – you can make a huge amount of changes. And you can do it far more easily than if you were trying to make changes to, say, a membrane keyboard.
Keyboard mods are not always strictly hardware-based, sometimes you’ll be making alterations to the keyboard’s software or simply making small aesthetic changes.
Is painting the keycaps a keyboard mod? I’d say so. It’s a good starting point for most people too. Learning to remove, paint, and reattach keycaps is a useful skill if you are going to be performing proper keyboard maintenance.
You will find that you can take even the most basic keyboards to a pretty high level by making some minor modifications. A good example is changing switches. If your keyboard is MX switch compatible then simply swapping some beautiful cherry Mx blues will be like a whole new keyboard to you.
Be warned that making modifications isn’t always cheap. The biggest reason that you’ll see a huge price increase in a keyboard is things such as the switches and keycaps being higher quality.
If you were planning on buying a cheap keyboard and making tons of modifications to it to save money, let me warn you now, you won’t. The switches alone could cost you 50 bucks for a full-sized keyboard. Let that be a benchmark for you.
It is possible to save money that way, we can’t always afford a really nice keyboard outright so improving it bit by bit is our only option. That’s fine, just don’t delude yourself when it comes to cost.
The risks of making mods?
Now, it’s important to mention that all of the mods mentioned in this article are absolutely 100% within the realms of possibility for you. You can manage them all pretty easily, especially with the help of a few YouTube videos. However, there are always going to be risks when making modifications.
Make it Worse
First of all, there is a risk that you end up making things worse. You might think that you have what it takes to make huge complex modifications to the keyboards printed circuit board after you’ve gained a little confidence performing some easy mods. But, you probably don’t. Don’t risk it.
Wasting Money
Another risk is that you end up wasting money by trying to make the mods yourself. Switches aren’t cheap, if you somehow manage to continually break them time and time again you are going to start to eat into your budget pretty quickly.
That’s why it’s perfectly acceptable to go to a computer repair store or other such establishment and have them make the modifications for you. It’s of course going to be cheaper to make the modifications yourself but if you end up having to pay for replacement pieces or repairs too then suddenly it’s not really financially viable anymore.
Void Warranty
The last risk I would caution you against is that you will often time’s find that making any sort of modification will void the warranty. If you try to change the switches, break them, and then send your keyboard back for a refund they are going to laugh in your face.
Always check the warranty details first. If your warrant is expired, go for it. If you still have a fair amount of time left I’d perhaps avoid it. However, if you don’t care that much about the keyboard in its current state then why not risk it?
If you went with a budget keyboard to improve it later worrying about the warranty is rather silly. So long as you fully consider the ramifications of taking your keyboard apart beforehand you’ll be fine.
What are some easy mods?
Not all mods are simple, sometimes you genuinely do need to have a ton of experience and some pretty complicated tools to make them. However, there are plenty of modifications you can make easily yourself that can elevate your keyboard game. These mods are all super doable so long as you are patient and willing to watch a few YouTube videos first.
Keyboard switches
First and foremost I would encourage you to change out your switches. The switches are probably the most expensive modification you will have to make, but also the most beneficial. Switches offer a lot of flexibility as you can find some that do pretty much anything you could want.
If you want a much quieter typing experience you could put in some cherry Mx silent reds. Conversely, if you want a little more tactlessness and you enjoy the click-clack feedback as you type – well, then, you might want some cherry Mx blues.
We can even move away from Mx switches are start looking at some specific types of switches rather than brands. For example, linear switches are very smooth and very quiet. You have so many options available to you that you are bound to find something you like.
Not all switches are compatible with all keyboards, but most are. Switches aren’t super difficult to change so long as you take your time and have the right tools. Again, be warned that a full set of switches might cost you around 30-70 bucks depending on how fancy you feel like getting.
Keycaps
Keycaps matter far more than you might realize. They are responsible for volume, comfort, and ease of use. Most importantly, though, they are a great way of putting your own little touches on the aesthetics of the keyboard.
It could be as simple as making your Keycaps match your PC, or as complex as picking new keycaps that have a notation of custom functions or macros you have installed on your keyboard.
Keycaps are a bit of a wild one, they are super simple to swap and there are literally endless options available. The reason I would say keycaps are a wild one is that they can become so incredibly expensive and are so addictive to purchase and install.
If you have spent any time scouring Reddit forums about keyboards, specifically Keycaps, you’ll know what I’m talking about. High-quality custom keycaps can cost hundreds of dollars for a full set. Of course, you can reuse the keycaps for any keyboard you end up using in the future so it’s not like you’ve wasted your investment.
But, not everyone can stomach hundreds of dollars worth of keycaps. You don’t have to spend hundreds you could buy some cheap ones and paint them yourself, the choice is of course up to you.
Related article: ABS Keycaps vs PBT Keycaps
Artisan Keycaps
Artisan Keycaps are basically an upgraded version of standard keycaps. They serve no extra functions but they look really cool. Artisan keycaps are usually sculpted into different shapes rather than being flat and uninteresting.
These caps can cost A LOT of money. A basic one will cost around $50 EACH while a more advanced one could cost a couple hundred. They are not cheap which is why you don’t put them on your whole keyboard, just one or two keys to really add a personal touch.
Stabilizers
Stabilizers are the first modification on this list that you might not have heard of. Stabilizers sit around or on top of the switch and between the cap and the switch itself to help keep it steady. Stabilizers are wonderful for stopping, or at least reducing, how much jiggle you get while typing.
Key wobble is super annoying and can even lead to mistakes while you’re gaming or working so it’s best to avoid it as much as possible. Most cheaper keyboards put next to no effort into reducing key wobble so you will notice the improvement immediately.
All keyboards will have stabilizers they just won’t be particularly good in most cases. Regardless of whether you want to replace them or not, there are some more little modifications you can make.
Using a hot glue gun or some kind of electrical tape you can lock the stabilizers in position. With a little bit of lube around the stabilizers to keep the keycap from sticking or jamming will leave you with a far more comfortable typing experience. It can also reduce the clacky sound while leaving you with a soft dull thud for each keystroke. Good stabilizers are always overlooked and it’s a shame.
Switch Films
Switch films serve a similar function to the stabilizer, however, they are used on all keys rather than just the space-bar and enter keys. Switch films are great at reducing stem top wobble which can make a huge improvement to the sound of your keyboard.
The problem with switches is that some have more wobble then others. The more the stem wobbles the “squeakier” it is. This makes each keystroke sound a little different than the last which is unpleasant, to say the least.
What switch films will do to correct this is they tighten every switch stem so they are the same. The result is a much more consistent sound between each keystroke. In my opinion, they are worth it and really don’t cost much for the improvement they offer.
O-rings
O rings are cheap, easy to install, and an absolute godsend. Your keyboard very likely did NOT come with O rings included. O rings are basically just little rubber rings that fit around the inside of the keycap. Why? Because they soften and dampen any of the noise and toughness from typing.
When you press the keycap down it depresses the lever on the switch and that registers a keystroke. Then your switch springs back up taking the keycap with it. Simple, the O rings mean that when you press your keycap there is no plastic on plastic clack from typing as the rubber acts as a buffer.
This also means that if you are someone who types rather heavy-handed and aggressively you don’t abuse your switches too much. O rings are dirt cheap and are incredibly easy to install. If you know how to take the keycaps off then you know how to install O rings more or less.
Upgrade USB Cable or Convert to Bluetooth
This one is probably the most complicated but it can have the most noticeable benefits. Firstly, your keyboard very likely doesn’t have a very high-quality USB cable. They just stick the cheapest one on possible. Luckily, you can absolutely change it if need be.
You can do something as simple as a swap to a higher quality corded USB which means you’ll just be splicing the cable or opening the keyboard up and disconnecting the USB from the PCB which would require a soldering iron. Or, you could do something a little more exciting like swapping the USB out completely for either a faster USB-C component or a Bluetooth transmitter. This is a little complicated but is certainly possible.
There is actually a really great article on this website that can help you make your wired keyboard wireless. The same article will give you the details needed to swap out the USB itself anyway.
This one will absolutely void your warranty so make sure you are comfortable doing so before you proceed. I know earlier on I mentioned that it’s always risky touching the circuit board but doing so with the USB port isn’t too bad, it’s designed to be easily soldered on and off.
Conclusion
Hopefully, this article has given you some inspiration regarding what kind of modifications you can make to your mechanical keyboard. There are so many great things you can do and you don’t need an engineering degree to do so.
Again, make sure you are fully prepared to deal with the repercussions of modifying your keyboard. Be they the risk of breaking your keyboard or simply voiding the warranty.
If I was you I’d start with simply installing some O rings and some newer, nicer, keycaps. Personally, blank keycaps have always been a fun mod for me. They always stand out and are very clean looking.
If you’re feeling brave you could jump right into the USB connector but that might be a little risky. Whatever you choose, good luck and have fun!