
If you are someone who makes use of a mechanical keyboard regularly, whether it’s for fun or comfort, you will want to get into the habit of cleaning it.
This isn’t just for hygiene reasons but for financial ones. If you keep on top of your cleaning, your keyboard will stay in good condition for as long as possible. If you are unsure of the how, why, and when of cleaning mechanical keyboard switches, then you are in the right place. This article has all the answers:
Table of Contents
What are Mechanical Keyboard Switches?
Mechanical keyboards use a physical switch under each key to determine when a key has been pressed. A laptop keyboard may have nothing but just a little pressure pad under each key, or an old USB keyboard may use little poppers to determine presses. These are not as effective or resilient as a mechanical keyboard.
When you press a key, the switch is flipped, and a signal is then sent to your pc to inform it of the press. This is why there is click-clack noise when typing on a proper mechanical keyboard. There is no right or wrong keyboard to use, it is all based on preference. If there was an argument to be made, mechanical keyboards would win.
Why is Cleaning Mechanical Keyboard Switches Important?
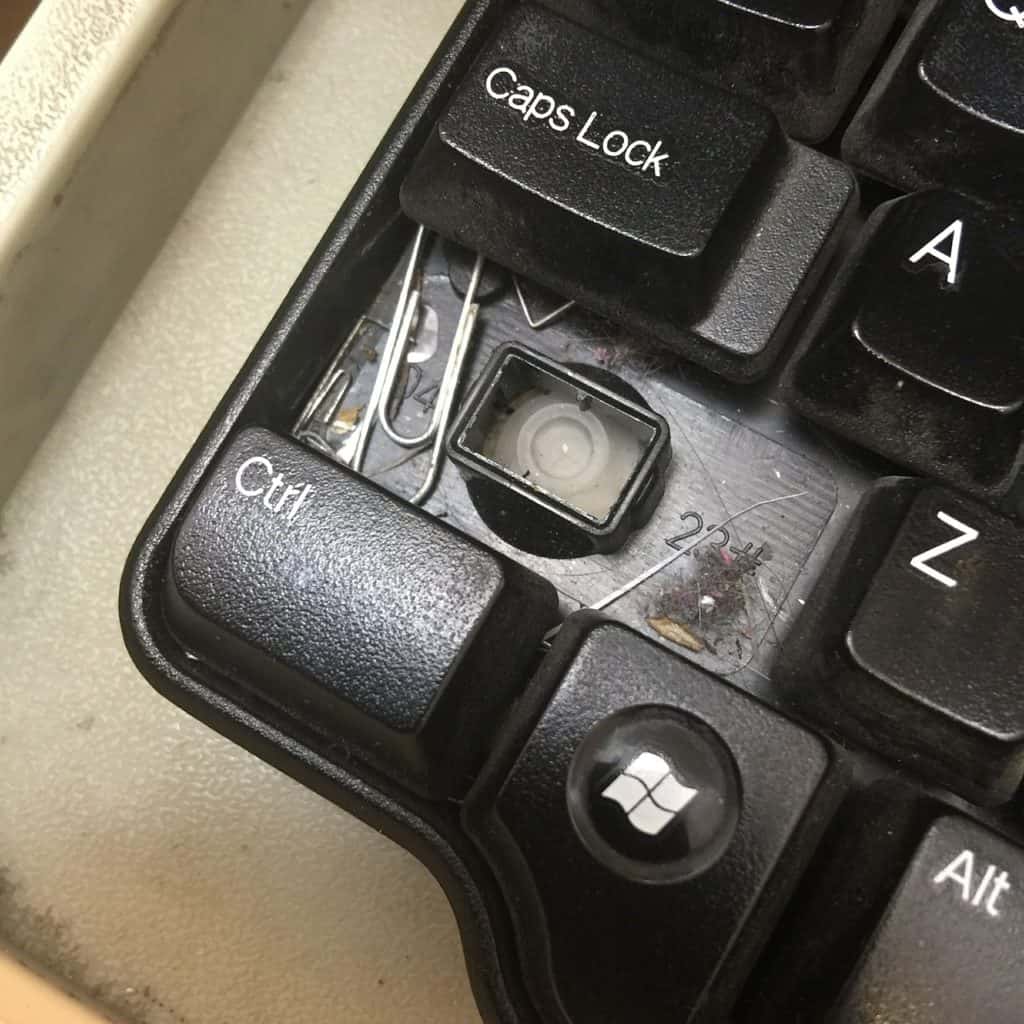
The advantage of having a mechanical keyboard is that it is far more resilient than the alternatives. The switches are not going to wear away any time soon, nor are they likely to break. The real problem comes from dust and grime build-up. Dust and grime aren’t going to break your keys, per se, but it will cause them to be less responsive and jam more easily.
The idea of a mechanical keyboard is that it is comfortable and quick to type on. If there is grime causing keys to stick or be less responsive it defeats the whole point. Besides, it is also more hygienic to keep them as clean as possible. If you spill your drink or some food on your keyboard you will want to wipe it off immediately. Firstly, because of the yuck factor. Secondly, because bacteria and mold will make you ill and will damage your keyboard. Mold and fungi would start to erode the switch components and internal wiring.
How Often do Switches Need Cleaning?
Your keyboard should be given a quick once over with a cloth once a week. Yes, you heard me right, once a week. It only takes a minute or two and is important for keeping your keyboard running like new.
When it comes to a bit more of a deep clean, once a month is a good idea. This means getting a can of compressed air and some rubbing alcohol solution. You can spray out the dust and grime and disinfect the keys.
It is a good idea, at least once every 3 months, to do a proper deep clean of your mechanical keyboard. This means taking it to pieces, scrubbing it all out thoroughly, and then putting it back together. This is also a good time to make any necessary repairs.
How do you Clean Mechanical Switches?
It is important to follow this step by step guide in order, otherwise, you risk making a mistake. Cleaning a keyboard is not overly difficult, it just requires a little bit of know-how and some patience.
It’s good that you decided to read up on this before just attempting to do it. Some people jump into these things and make awful mistakes like cleaning a circuit board with acetone.
Anyway, I digress. Here are the steps to ensure your keyboard works like new:
Remove keycaps:
First, you need to remove the keycaps. This is easy enough, they pretty much just pop right off. It is a good idea to put them all in a bowl so you don’t lose them. You can also wipe down the keycaps with a damp cloth on both sides. You may want to spray some compressed air inside each key, though it likely isn’t very dusty at all.
Compressed air:
Once the keys are off it is time to spray in all the cracks and crevices with your can of compressed air. Make sure to spray up and down the rows of keys to get them at every angle. Don’t hold the nozzle to close to the keyboard or you may damage the switch.
Use a nylon brush:
Using a thin nylon brush you will be able to wipe away any of the tougher dirt and grime that the air couldn’t get. Take your time to ensure you remove any stuck debris and then wipe it off. If your brush becomes too dirty, wipe the brush on a damp cloth.
Wipe down using a dampened cloth with a cleaning solution:
Using premixed alcohol and water solution dampen a NEW cloth. Gently rub this cloth up and down all of the keyboard. You mustn’t put too much alcohol or you may erode the paint/plastic on your keyboard.
Clean and lubricate stabilizers:
The stabilizers hold the keys in place. They are prone to become stuck or worn down with time as dust and grime build-up. It is important to keep these clean just as much as it is to keep the keys and switches themself.
Let dry:
Let the alcohol solution dry on its own. It will dry over time just by being exposed to air. It will only take an hour or so. Once it is dry, wipe it down one last time with a dry cloth. Not a damp one or you will need to let it dry again.
Install keycaps:
Lastly, it is time to put the keycaps back on. Make sure you put them on in the right place. Find a diagram of a keyboard online and copy it. Better yet, take a picture of your keyboard before you start so you can remember where everything belongs.
Cleaning mechanical switches quick recap:
- Remove the keycaps
- Blast every crack and crevice with compressed air
- Use a nylon brush for the thicker gunk
- Wipe down using a dampened cloth with a cleaning solution
- Clean and lubricate stabilizers
- let it air dry for about an hour
- Give it one final wipe down with a dry cloth
- Re-instal the keycaps
Spilled Liquid on Mechanical Keyboard
Oof, that is the worst. If this happened to you, and you just want a quick cleaning method, you have to check out this video! Apparently cleaning your mechanical keyboard switches with Purell hand sanitizer is a viable option!
Conclusion:
You now have everything you need to know to keep your mechanical keyboard clean. Cleaning your keyboard is not the most fun chore, but it must be done. A good way to keep it interesting is to have more than one set of keycaps. Each time you clean the keyboard, swap the caps over. This keeps things fresh and interesting.