
If you have high-quality gaming or work keyboard that came at a high budget, you would want to ensure that it is protected from all kinds of problems – including dust and moisture. Well, sometimes that can be not easy unless you’re thinking of using a silicone keyboard cover.
You might be wondering what a keyboard cover is and how it works to protect the keyboard; Well, if that’s the case, you’re exactly in the right place.
Today we will discuss what a keyboard cover is, why you shouldn’t use your keyboard without it, and the benefits of using keyboard covers. I have also included a guide for making your very own DIY silicone keyboard cover.
So, let’s get started.
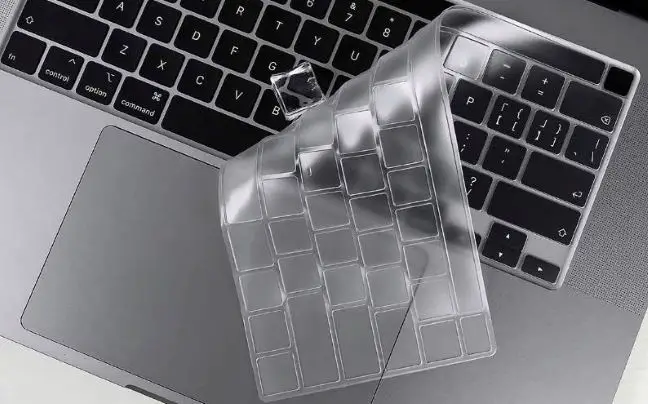
Table of Contents
What is a Keyboard Cover?
A keyboard cover or protector is a piece of equipment used to protect a keyboard from external environmental factors and limit its interaction with the outer environment.
These environmental factors include dust, moisture in the air, spillage, and other things that might harm the keyboard’s integrity. In addition, keyboard covers are usually considered not that great because they’re plain and simple, which doesn’t sit right with someone who uses RGB equipment.
But due to the sudden rise in popularity of keyboard covers, clear covers that come with adornments, designs, and patterns have come into the market that you can actually buy and use to make your keyboard look even better while you save it from potential damage at the same time.
Keyboard covers are available in all sizes and all kinds of keyboards. So whether you’re using a laptop or you’re thinking of covering your full-sized PC keyboard, a cover would be the right choice of protection.
Problems with Using Keyboards without protective cover
Imagine buying a very expensive keyboard because of how good it looks and performs, and you end up messing it because of an accident that could’ve been contained. Here are some of the problems you might face if you use a keyboard without a protective keyboard cover.
- Keycap Fade – If your keyboard is placed in a room with high moisture, the keyboard surface might become wet over time. This can lead to the keycaps of the keyboard fading and the legends disappearing because of the excessive moisture.
- Oily Keys – When you eat while you’re working or gaming, it is very likely that you’re going to get oil on your hands because, let’s be honest, nobody eats with gloves on. Your keycaps can absorb this oil, and they’ll become shiny and slippery, which isn’t what we want.
- Faulty Switches – Keeping a bottle of water or your favorite beverage near your keyboard on the computer desk is no new tradition. Everyone does that. But not everyone has the privilege to say that they didn’t spill their drink. If your drink gets spilled on your keyboard, it can cause the switches to break and not function properly.
- Double Pressing Keys – Dust is also a major factor that affects your keyboard’s performance. When there’s a lot of dust stuck in between the keycaps and the switches, the keyboard might end up typing double or, in the worst case, not typing at all, which can be quite problematic.
Benefits of Using a Keyboard Cover
Keyboard covers can work wonders for your keyboard’s protection that you would’ve never even thought about before actually facing a problem. Let’s talk about some of the major benefits of using keyboard covers in general.
- No Spillage – When you have a complete layer of plastic or silicone protection on top of your keyboard, there won’t be any crevices or holes from where any water or drink might get into the switches, which is why your keyboard will remain safe.
- No Oily Keycaps – The best bet to stop your oily hands from messing up the texture of your keycaps is for you to use a plastic keyboard cover whenever your hands are oily or dirty. This will keep your keycaps completely safe from any oiliness.
- Dust-Proof Surface – Worried about dust getting into the keyboard because of a high-raised keycap design; Well, with the help of a proper keyboard cover, you’ll be able to block any dust that might make its way into the keyboard without any protective cover, so you’ll be good to go with a dust-proof surface.
- Moisture-Resistance – Due to bad air vents or too much cold and air conditioning in your room, the moisture can be a little too much. Well, to tackle that, you can use keyboard protectors, which will make sure moisture doesn’t reach your keys at all.
- Changing the Look – Nowadays, keyboard covers come in many different designs, colors, clear material, patterns, and adornments, which all make the keyboard look different and special. That’s why getting a good-looking keyboard cover would help you change up the keyboard’s look whenever you desire to do so.
- No Fading – Fading legends on keycaps aren’t a new thing as we talked about it. But if you want fading legends to be fade-free on your keyboard completely, then using a high-quality plastic keyboard cover would definitely help. Then, no matter whether the imprints are fade-prone or not, there will be no fading due to non-direct contact with the keycaps.
How to Make a DIY Silicone Keyboard Cover
Although keyboard covers aren’t expensive, if you’re thinking of being a little creative and making your own keyboard cover, there’s nothing wrong with that. Lucky for you, I’ve made a list of all the steps you will utilize to make sure your DIY silicone keyboard cover comes out perfect. So let’s take a look at these steps thoroughly.
Step 1: Gather Equipment
First of all, you’re going to want to gather all the equipment no matter what kind of DIY project you might be doing. Especially, in this case, you’re going to need a few things you might not have at your home from the get-go.
Make sure you make a mold for your keyboard of choice; for that, you’ll need a scale as well as a pen for marking. You’re also going to need a silicone rubber mixture or components that you can use when molding the keyboard cover itself.
Step 2: Take the Dimensions
Now that you have everything you need, you will take the dimensions for the keyboard cover mold. Basically, you’re going to use these dimensions for the creation of the keyboard cover mold.
You can take the dimensions of the keyboard’s depth, length, and width, and then you can make a proper keyboard cover using the dimensions and the mold. So, make sure you don’t make a mistake when you’re taking the dimensions. They’re going to prove to be very crucial.
Step 3: Make a Mold
There are multiple ways you can actually go about making a mold. The first one is using a hardening material such as clay. Then, you can take the keyboard and use it to form the mold itself.
If that’s not something you’re up for, then making a 3d printed mold with the dimensions you took earlier would be a pretty great thing to do. So, you can choose to do that as well. But, ultimately, this mold is what will make sure your keyboard cover comes outright.
Step 4: Prepare the Silicone
Preparing the silicone is one of the essential steps in this process. The silicone mixture you’re using might’ve come in an already usable form, or there might be a few packets that you need to mix to get to the final usable silicone liquid mixture.
If you’re using the latter, make sure you mix the silicone material according to instructions and that you use a proper mixing tool to avoid making any air bubbles that might mess up the final keyboard cover product.
Step 5: Pour the Silicone into the Mold
Now the crucial step that you’ve all been waiting for. We’re going to pour the silicone into the mold that we created. Know that this mixture can be poured into any mold, as I said before.
The pouring process needs to be precise. If you’ve measured just the right amount of silicone mixture, you need to ensure every drop is poured correctly. Otherwise, we might end up losing a bit of silicone which can be problematic. So, be careful when you’re pouring the silicone.
You can also add a few stickers in there or add some coloring to make the mixture look different if you want to; however, there is also the option to paint it after it is set so that we can wait on that.
Step 6: Let the Mold Rest
You’re going to place the cover onto the mold, so we have a hollow thin layer of silicone keyboard protective cover at the end of the day. Make sure the amount of silicone in the mold is right.
Now you’re just going to let the mold rest and dry so that you can ultimately get done with making your very own DIY silicone keyboard cover. It would help if you let the mold rest for at least 12 hours overnight, and you’ll be pleasantly surprised by the end of this span.
Step 7: Take the Cover Out
After the time span is over, you’re going to gently and carefully take the DIY silicone keyboard cover out of the mold. If everything went as planned, it would be flexible, light, and perfect for your keyboard.
However, as most molds do, the keyboard cover might not come out perfectly shaped. So if you want to make it aesthetically pleasing, then you’re going to have to do the next step as well.
Step 8: Make Necessary Adjustments
Once you’ve taken the silicone keyboard cover out, you need to marvel at the beauty that you created, but at the same time, you’re going to need to make necessary adjustments to it.
This may include trimming excessive edges, shaping the keyboard cover, and putting it next to the keyboard to see whether it needs any finish before it fits perfectly on your keyboard. All of this will be necessary for due time.
Step 9: Clean the Silicone Keyboard Cover
If you want the silicone keyboard cover to look crisp, clean, and clear so that your keyboard’s RGB light doesn’t get hindered, cleaning it would be an essential part of the process.
You can use a polishing spray or a microfiber cloth and wet it with a bit of water. This will allow you to clean the surface of the keyboard cover before you end up using it.
Step 10: Use the DIY Silicone Keyboard Cover
Finally, after a strenuous process, you’re going to be able to use the silicone keyboard cover that you made yourself. You can now place it on your keyboard’s surface and protect it completely.
Please do me a favor, and check the difference before and after applying the keyboard cover. You will be pleasantly surprised by the level of protection the keyboard cover provides to your keyboard!
Conclusion
Keyboards do get stained and dirty and let’s admit it; it’s tough to clean them because there is always a chance of getting moisture inside. Moreover, you cannot spray water directly onto your keyboard, and therefore to remove dirt from between the keys, you will need some specialized equipment.
Why go to such lengths when you can make your own keyboard cover at home? It might seem like a difficult task, but it’s not. In this article, I listed all the steps needed to make a high-quality and long-lasting silicone cover to protect your keyboard from dust and other contaminants.
Making your very own DIY silicone keyboard cover to tackle problems like dust, moisture, oiliness, and others can be a really great decision, especially if you want to save some money. All you need to do basically is follow the above-mentioned steps, and you’ll be good to go. I hope you learned a lot from this guide and that you will utilize my advice to make the best keyboard cover that you can. So have a great time with your brand new DIY silicone keyboard cover.